File Manager Guide
The File Manager is where you control which files get bundled into your compiled executable. Every file in your web project folder is tracked here, and you decide how each one is handled during compilation.
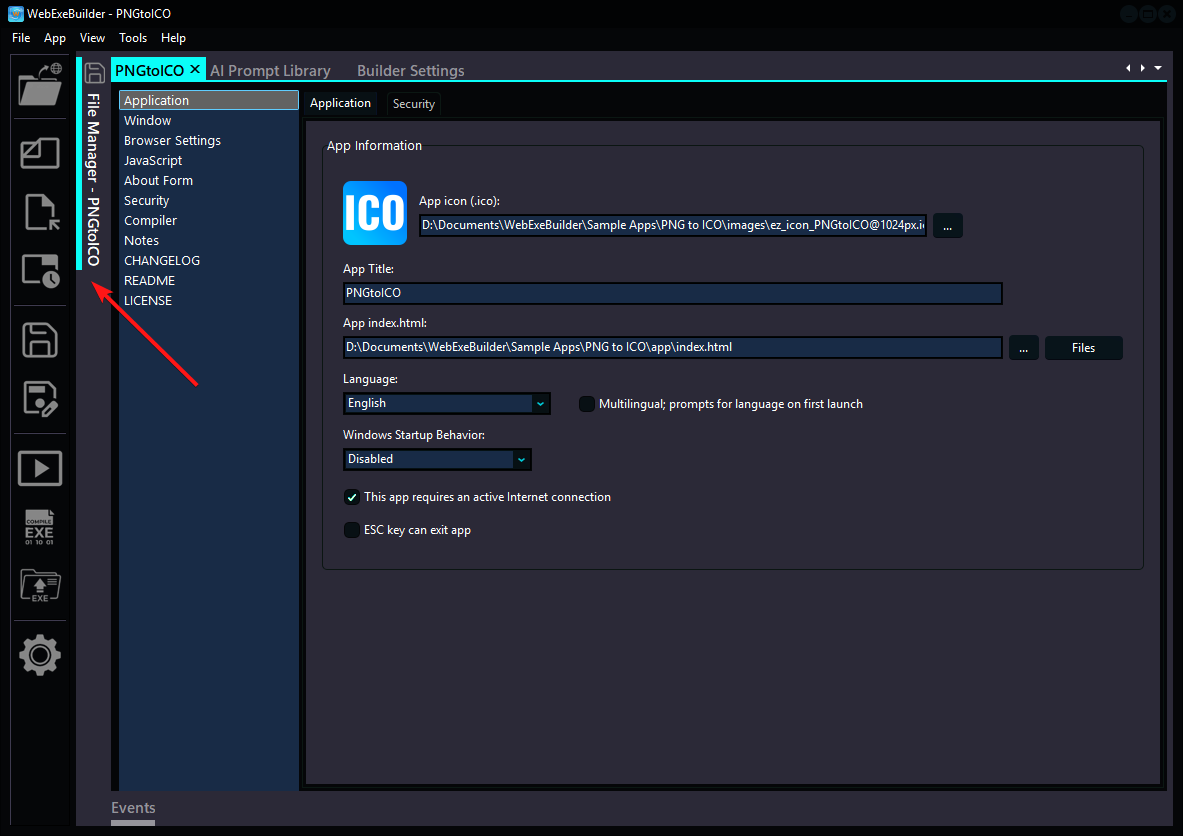
Opening the File Manager
The File Manager lives in a dock panel on the left side of the Builder. To open it:
- Go to View → File Manager from the menu
- Or click the File Manager button on the toolbar
The panel automatically loads the files from your current project's web folder (the folder containing your index.html).
Dock Panel Behavior
The File Manager is a modified dock panel, which means it can be:
- Docked to the left, right, top, or bottom of the Builder window
- Floated as a separate window by dragging its header away from the dock site
- Auto-hidden to a tab on the edge of the window (click the pin icon on the header)
- Closed by clicking the X on the header or right-clicking and choosing Close
A few things to know about the panel:
- Double-clicking the panel header will auto-hide it (collapse it to a tab on the edge). This is handy when you need more screen space for the App Options.
- When auto-hidden, click the tab on the edge to slide it back open temporarily. Click elsewhere to hide it again.
- The File Manager automatically saves your file settings when the panel closes, when you switch projects, or when you compile.
- When you switch between project tabs, the File Manager updates to show the files for the active project.
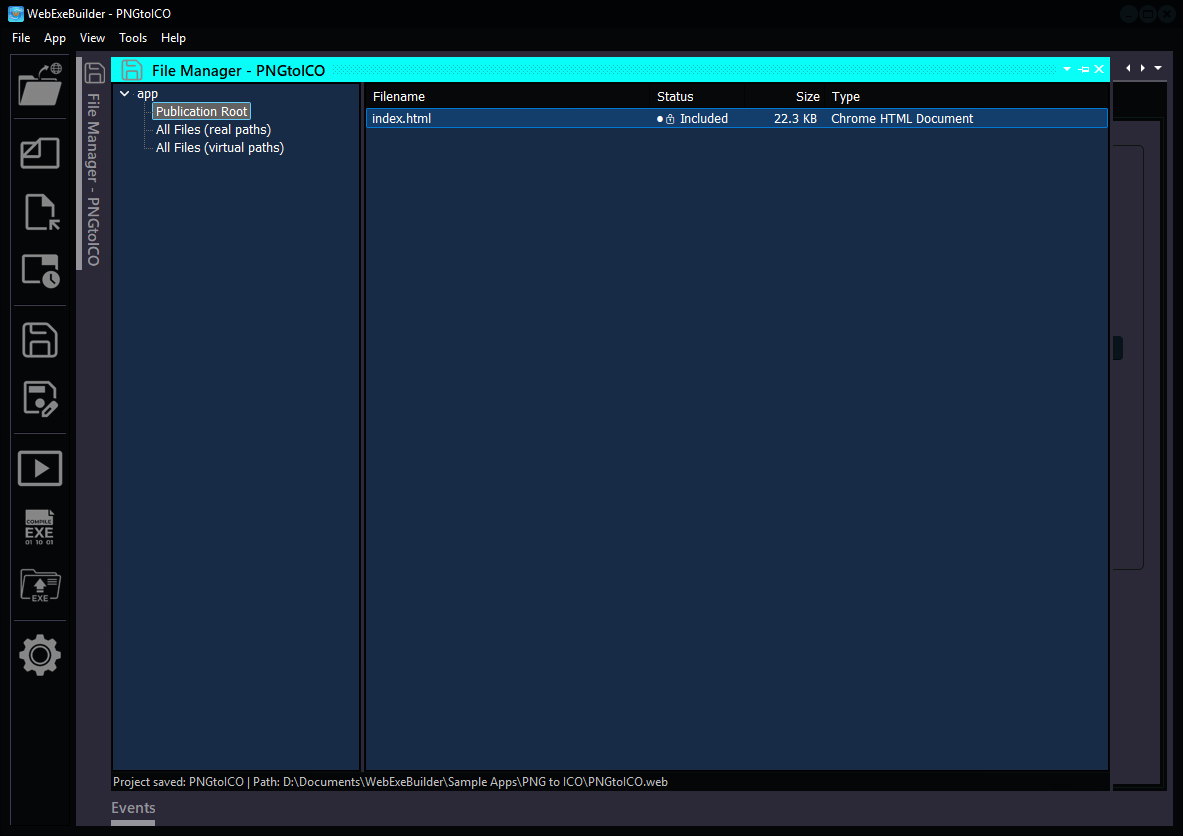
Layout
The File Manager has two panes:
- Left pane — a folder tree showing your project's directory structure, plus special nodes for "All Files" views and virtual folders
- Right pane — a file list showing the files in the selected folder, with columns for Filename, Status, Size, and Type
The status bar at the bottom shows file counts and operation messages.
File List Columns
| Column | What It Shows |
|---|---|
| Filename | The file name |
| Status | Inclusion status: Included, Excluded, or External |
| Size | File size (B, KB, MB, GB) |
| Type | File extension/type |
Click any column header to sort by that column. Click again to reverse the sort order.
File Status Types
Every file in your project has an inclusion status that controls how it's handled during compilation:
Included
The file will be embedded inside the compiled .exe in the Virtual File System (VFS). This is the default for most files. At runtime, your app loads these files directly from the embedded archive.
Excluded
The file is ignored during compilation. It won't be in the .exe and won't be available at runtime. Use this for development files, documentation, source maps, or anything you don't want shipped and especially your WebExeBuilder project files *.web which should never be included.
External
The file is tracked by the project but kept outside the .exe archive. External files must be distributed alongside the executable. Use this for large files that would bloat the .exe, or files that need to be user-editable after deployment.
Right-Click Menu (File Actions)
Right-click on one or more selected files to see these options:
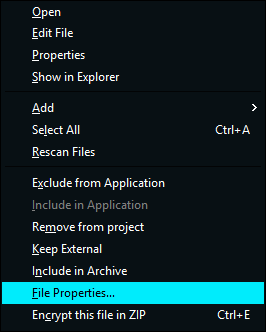
Open
Opens the file with its default Windows application (e.g., a browser for HTML, an image viewer for PNG).
Edit File
Opens the file in your system's default text editor. For code files (HTML, CSS, JS, JSON), this is a quick way to make edits without leaving the Builder.
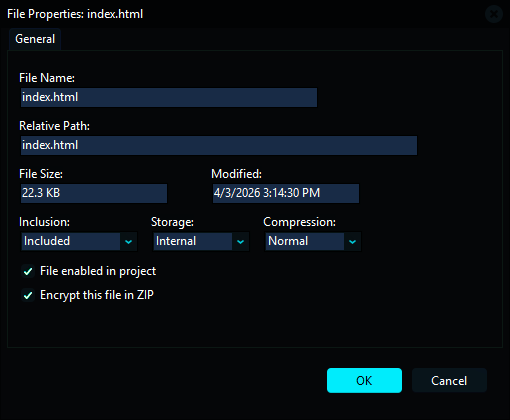
Properties
Shows a detailed properties dialog for the selected file, including:
- File name and relative path
- File size and last modified date
- Inclusion type (Included / Excluded / Conditional)
- Storage type (Internal / External)
- Compression type (None / Fast / Normal / Maximum)
- Encrypted flag
- Enabled/disabled toggle
Show in Explorer
Opens Windows Explorer and highlights the selected file. Useful for finding the file on disk.
Add → Add File(s)
Browse for one or more files to add to the project. The files are copied into your project folder and added to the file list.
Add → Add Folder
Browse for a folder to add. All files in the folder (and subfolders) are added to the project recursively.
Add → Add Virtual Folder
Create a virtual folder — a folder that exists only in the project structure, not on disk. Virtual folders let you organize files in the VFS differently from how they're stored on your file system. Files placed in virtual folders will appear at that virtual path inside the compiled .exe.
Select All
Selects all files in the current view. Keyboard shortcut: Ctrl+A.
Rescan Files
Re-scans the project folder to detect new, modified, or deleted files. The File Manager will:
- Find files that were added to the folder outside of the Builder
- Detect files that were deleted from disk
- Update file sizes and modification dates
Include in Application
Sets the selected file(s) to Included status. They will be embedded in the .exe.
Exclude from Application
Sets the selected file(s) to Excluded status. They will be skipped during compilation.
Keep External
Sets the selected file(s) to External storage. They'll be tracked but not embedded in the .exe.
Include in Archive
Sets the selected file(s) to Internal storage. They'll be embedded inside the .exe archive.
Remove from Project
Removes the selected file(s) from the project tracking. The actual files on disk are not deleted.
Encrypt this file in ZIP
Marks the selected file(s) for encryption inside the ZIP archive. Encrypted files are protected using a special project isolated encryption key. This adds a layer of protection for sensitive content like proprietary JavaScript or configuration files. Keyboard shortcut: Ctrl+E.
Delete Virtual Folder
Removes a virtual folder and its file assignments (only visible when a virtual folder is selected).
Folder Tree Actions
Right-click on a folder in the left tree pane:
Exclude All Files in Folder
Sets every file in the selected folder to Excluded status. Handy for quickly excluding entire directories like node_modules, .git, .web or build output folders.
Drag and Drop
You can drag files from Windows Explorer directly into the File Manager's file list. Dropped files are copied into the current folder and automatically added to the project.
Keyboard Shortcuts
| Shortcut | Action |
|---|---|
| Ctrl+A | Select all files |
| Ctrl+E | Encrypt selected file(s) in ZIP |
| Delete | Remove selected file(s) from project |
| Enter | Open selected file |
How Files Get Into the .exe
When you compile your project, here's what happens to your files:
- All files with Included status and Internal storage are collected
- They're compressed into a ZIP archive (using each file's compression setting)
- Files marked for encryption are encrypted within the archive
- The ZIP archive is appended to the stub executable as an overlay
- At runtime, the app extracts and serves files from this embedded VFS
Files with External storage are not in the archive — they must exist alongside the .exe on the user's machine.
Files with Excluded status are completely ignored.
Tips
- Rescan regularly if you're editing files outside the Builder — the File Manager doesn't watch for external changes automatically
- Use virtual folders to reorganize your VFS without moving files on disk
- Encrypt sensitive files like API keys, proprietary code, or configuration data
- *Exclude development files like
.mapfiles,node_modules,.git, test files, project files*.weband build scripts to keep your .exe lean - Check the status bar for file counts and operation feedback
- Sort by Status to quickly find excluded or external files in your project
- Multi-select works — hold Ctrl or Shift to select multiple files, then apply actions to all of them at once